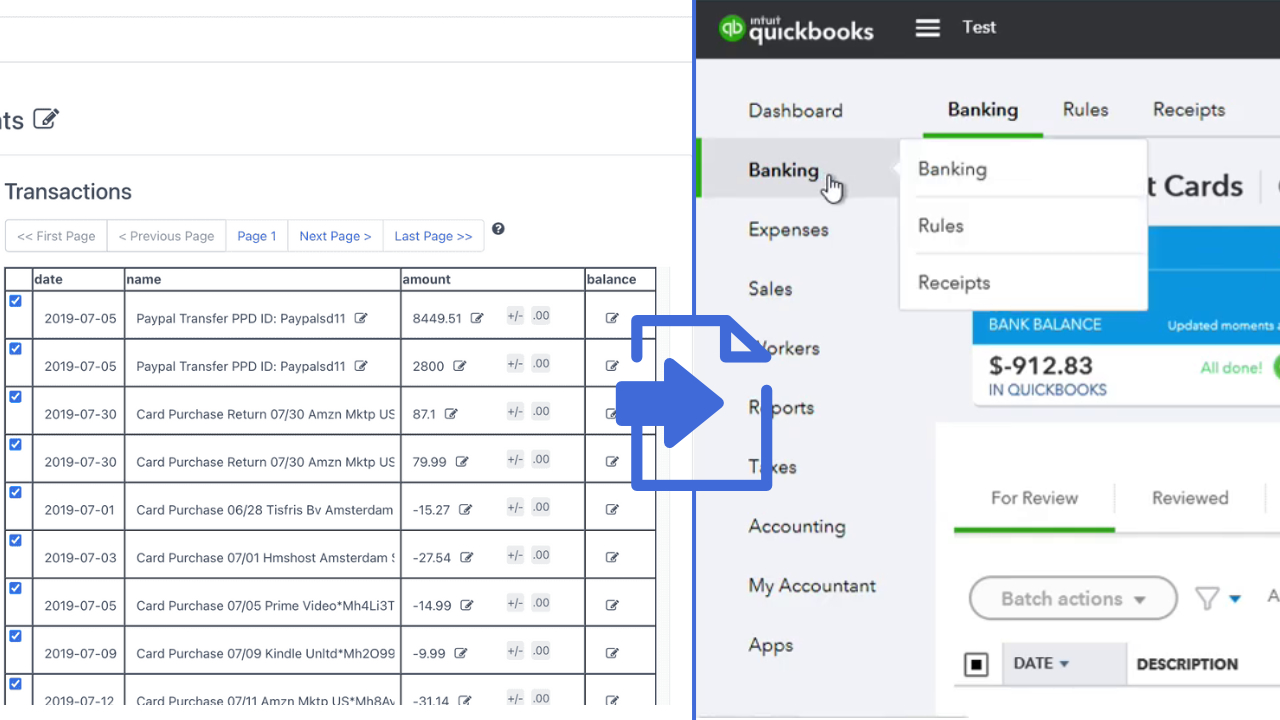
To import expenses into Quickbooks Online, access your Quickbooks Online company and go to the Transactions tab. From there, select Banking and choose Upload from file in the Link account drop-down menu.
Click the Drag and drop or select files button, select the CSV file containing your expenses, and then click Open to complete the import process.

Credit: www.saasant.com
Introduction To Importing Expenses Into Quickbooks Online
Importing expenses into Quickbooks Online is important because it allows for efficient and accurate tracking of financial data. By importing expenses, you can easily reconcile your bank statements, track your cash flow, and generate detailed reports for financial analysis.
- Streamlined process: Importing expenses saves time and effort compared to manual data entry.
- Accuracy: Importing expenses reduces the risk of human error and ensures accurate financial records.
- Efficiency: Importing expenses allows for real-time tracking of expenses, enabling you to make informed financial decisions.
- Reporting: Importing expenses provides you with the ability to generate comprehensive financial reports for budgeting and forecasting purposes.
The process of importing expenses into Quickbooks Online is straightforward. Access your Quickbooks Online company, go to the Transactions tab, select Banking, and choose the option to upload from a file. Then, select the CSV file containing your expenses and proceed with the import. Make sure to properly map your expense categories to ensure accurate recording. Once the import is complete, you can review and verify your expenses within Quickbooks Online.

Credit: www.saasant.com
Step 1: Accessing Quickbooks Online And Selecting The Transactions Tab
Accessing your Quickbooks Online company:
- Navigate to the Transactions tab
- Select the Banking option
To import expenses into Quickbooks Online, follow these steps:
- Access your Quickbooks Online company.
- From the Transactions tab, select Banking.
- In the Link account drop-down, select Upload from file.
- Click the Drag and drop or select files button.
- Select the CSV file and then Open.
Alternatively, you can import transactions by going to the Transactions tab, selecting Bank transactions, and then uploading the file downloaded from your bank. Quickbooks Online also provides the option to import expenses using CSV files. Simply go to the Transactions tab, select Banking, and in the Link account drop-down, choose Upload from file.
Step 2: Uploading The Expense File
To import expenses into Quickbooks Online, follow these steps:
- Access your QuickBooks Online company.
- From the Transactions tab, select Banking.
- In the Link account drop-down, select Upload from file.
- Click the Drag and drop or select files button.
- Select the CSV file and then Open.
If you prefer another method, you can also select the option to drag and drop the CSV file instead of selecting it.
Step 3: Mapping And Reviewing The Expenses
When it comes to mapping and reviewing expenses in Quickbooks Online, there are a few important steps to follow. First, you need to understand the mapping screen, which allows you to determine how the imported expenses will be categorized in your Quickbooks accounts. Next, you can customize the import settings to match your specific requirements.
After that, it’s crucial to preview the mapping to ensure everything is set up correctly. This will give you a chance to review how the expenses will be imported before making any changes.
Once you’re satisfied with the mapping, you can proceed to review the imported expenses. Take the time to carefully go through each expense to ensure accuracy and make any necessary adjustments.
Finally, it’s essential to check the status of the import to ensure all expenses have been successfully imported into Quickbooks Online. This step will provide you with peace of mind that everything has been completed correctly and accurately.
Step 4: Managing Imported Expenses
| How to Import Expenses into Quickbooks Online |
| Step 4: Managing Imported Expenses |
| Removing Synced Transactions |
| Contacting SaasAnt for assistance |
| Importing expenses from other sources |
Importing expenses into Quickbooks Online can be a seamless process when following a few simple steps. Once the expenses have been imported, it is important to manage them effectively. One crucial step in managing imported expenses is removing synced transactions that may have duplicate entries. This can be done by reviewing the imported expenses and identifying any duplicates. Additionally, if any issues or challenges arise during the process, it is recommended to contact SaasAnt, a reliable source of assistance for Quickbooks Online users. It is also worth noting that expenses can be imported from other sources, such as spreadsheets or CSV files, making it convenient for businesses to track and manage their financial records efficiently.
Additional Methods For Importing Expenses
When it comes to importing expenses into Quickbooks Online, there are additional methods available to make the process more efficient. One of these methods is importing expenses from Excel into Quickbooks Online. This can be done by accessing your Quickbooks Online company, selecting the Transactions tab, and then choosing the Banking option. From there, you can select the option to upload from a file and choose the Excel file containing your expenses. Another method is importing expenses using Axis, which requires creating a map to match the data in your file with the appropriate fields in Quickbooks Online. Additionally, expenses can be imported from a CSV file by selecting the Banking option under the Transactions tab and choosing to upload from a file. This allows you to select the CSV file containing your expenses and import them into Quickbooks Online. These methods provide quick and convenient ways to import expenses into Quickbooks Online for efficient management of your financial transactions.

Credit: www.saasant.com
Frequently Asked Questions On How To Import Expenses Into Quickbooks Online
How Do I Bulk Import Expenses Into Quickbooks Online?
To bulk import expenses into QuickBooks Online, follow these steps: 1. Access your QuickBooks Online company. 2. Go to the Transactions tab and select Banking. 3. In the Link account drop-down, choose Upload from file. 4. Click the Drag and drop or select files button.
5. Select the CSV file containing your expenses. 6. Open the file to upload it.
Is There A Way To Import Transactions Into Quickbooks Online?
Yes, you can import transactions into QuickBooks Online. From the Transactions tab, select Banking, then choose to upload from a file. Click the Drag and drop or select files button, select the CSV file, and then open it. This will allow you to import your transactions into QuickBooks Online.
Can You Import Expenses With Quickbooks?
Yes, you can import expenses into QuickBooks. Access your QuickBooks Online company, go to the Transactions tab, select Banking, and choose to upload from a file. Select the CSV file containing your expenses and open it. QuickBooks will guide you through mapping the information and importing your expenses.
How Do I Import Entries Into Quickbooks Online?
To import entries into QuickBooks Online, follow these steps: 1. Go to Settings ⚙️ and select Import Data. 2. Choose Journal Entries and select the file you want to import (CSV or Excel). 3. Map your information correctly and select Next.
4. Click Start import and then Done. You can also upload transactions by going to Transactions, then Bank transactions, and selecting Upload transactions.
Conclusion
To import expenses into QuickBooks Online, follow these easy steps: access your QuickBooks Online company, go to the Transactions tab and select Banking, choose Upload from file in the Link account dropdown, click the Drag and drop or select files button, select the CSV file and open it.
This simple process allows you to import your expenses efficiently and accurately into QuickBooks Online. Enjoy the convenience and organization that QuickBooks offers for managing your expenses seamlessly.

Elaine C. Durham is a distinguished figure in the domain of new business investments, recognized for her expertise and strategic acumen in navigating the dynamic landscape of emerging ventures. With a robust educational background and a wealth of experience, Elaine has become a trusted authority in the field, contributing valuable insights to the realm of investment strategies for nascent businesses. Her professional journey is marked by a keen ability to identify promising opportunities, coupled with a shrewd understanding of market dynamics and risk management. Known for her innovative approach and successful endeavors, Elaine C. Durham stands as a beacon for entrepreneurs and investors alike, offering a wealth of knowledge on fostering growth and sustainability in the ever-evolving world of new business investments.